
 Bookmark
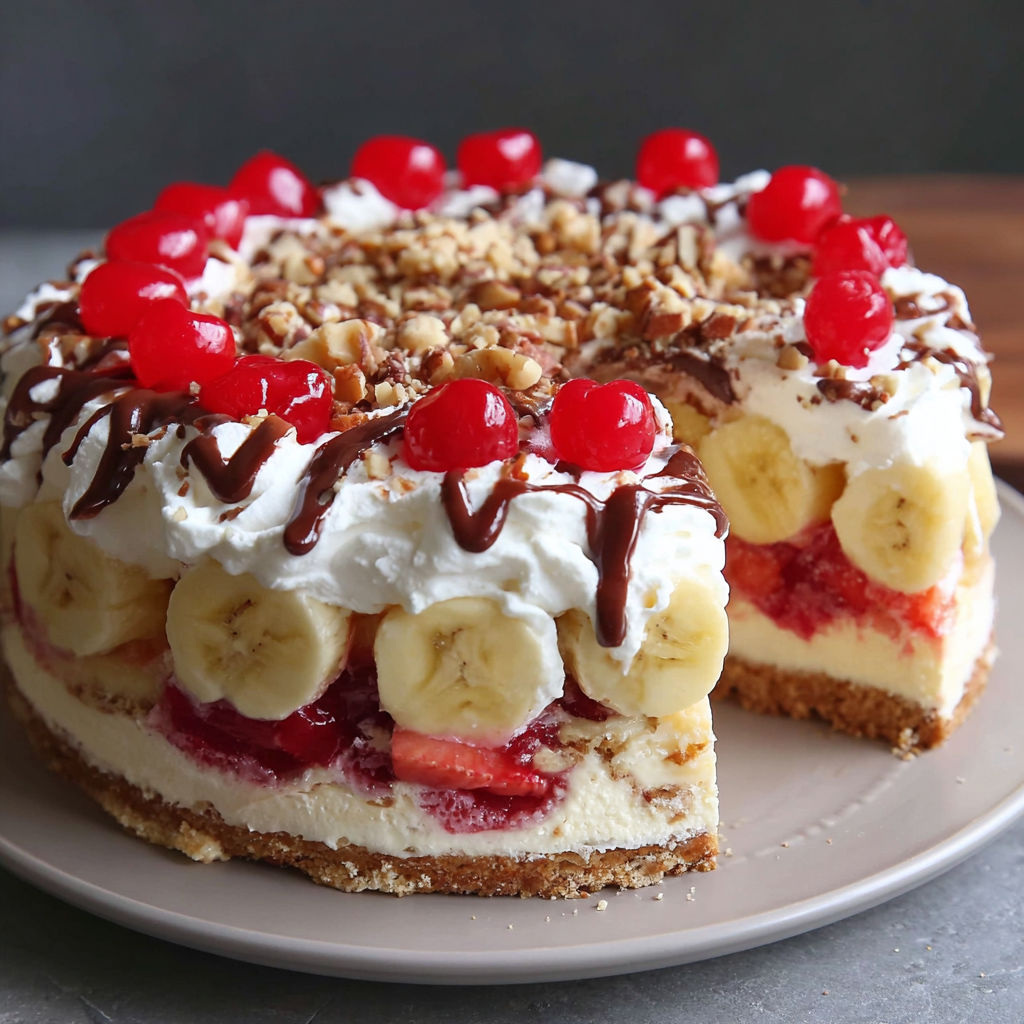
This easy layered no-bake banana split cake is my go-to dessert when I want to impress a crowd but keep the kitchen cool. Every time I slice into these creamy layers topped with fruit and chocolate I’m reminded of laughter-filled summer parties and the joy of making something beautiful without ever turning on the oven. You get all the nostalgic flavors of a classic banana split in a fuss-free cake that tastes even better chilled.
We first made a version of this cake at a backyard reunion where the kids all helped layer strawberries and sneak a few bites of cream. Now we get requests for it at almost every summer celebration.
Ingredients
- Graham cracker crumbs: provide a crunchy buttery foundation for each slice always choose fresh crackers for the best texture
- Unsalted butter: binds the crust while adding rich flavor try European-style for extra depth
- Granulated sugar: sweetens the crust just right check for any lumps before adding
- Cream cheese: brings a tangy creaminess it should feel soft and smooth when pressed
- Powdered sugar: adds light sweetness to the filling and topping sift before using to prevent clumps
- Sweetened condensed milk: turns the cream cheese mixture extra silky look for cans with no added thickeners
- Cool Whip or homemade whipped cream: delivers that classic fluffy finish choose one with high fat content for stability
- Ripe bananas: offer the signature flavor pick ones with yellow peels and no brown spots
- Canned crushed pineapple: adds tropical sweetness drain and pat dry so your dessert stays firm
- Fresh strawberries: create that showstopper look rinse and slice right before layering to keep colors bright
- Optional toppings: such as chopped pecans chocolate syrup and maraschino cherries supply fun and crunch make sure the nuts taste fresh and cherries are dry for best results
Instructions
- Prepare the Crust:
- Mix graham cracker crumbs with melted unsalted butter and granulated sugar in a bowl with care so all crumbs look glossy and damp. Use your hands or a spatula for best results. Press this mixture firmly and evenly into the bottom of a 13 by 9 inch baking dish. Pay special attention to corners and edges for structure. Refrigerate for at least 20 minutes so it sets firm.
- Make the Cream Cheese Layer:
- Place room temperature cream cheese into a large mixing bowl. Beat until smooth and fluffy using an electric mixer set on medium speed. Gradually add powdered sugar and beat again until there are no lumps. Pour in sweetened condensed milk and a squeeze of fresh lemon juice. Beat again just until combined and creamy. Gently fold in Cool Whip or homemade whipped cream with a wide spatula using smooth strokes until the mixture is light and even.
- Layer the Bananas and Pineapples:
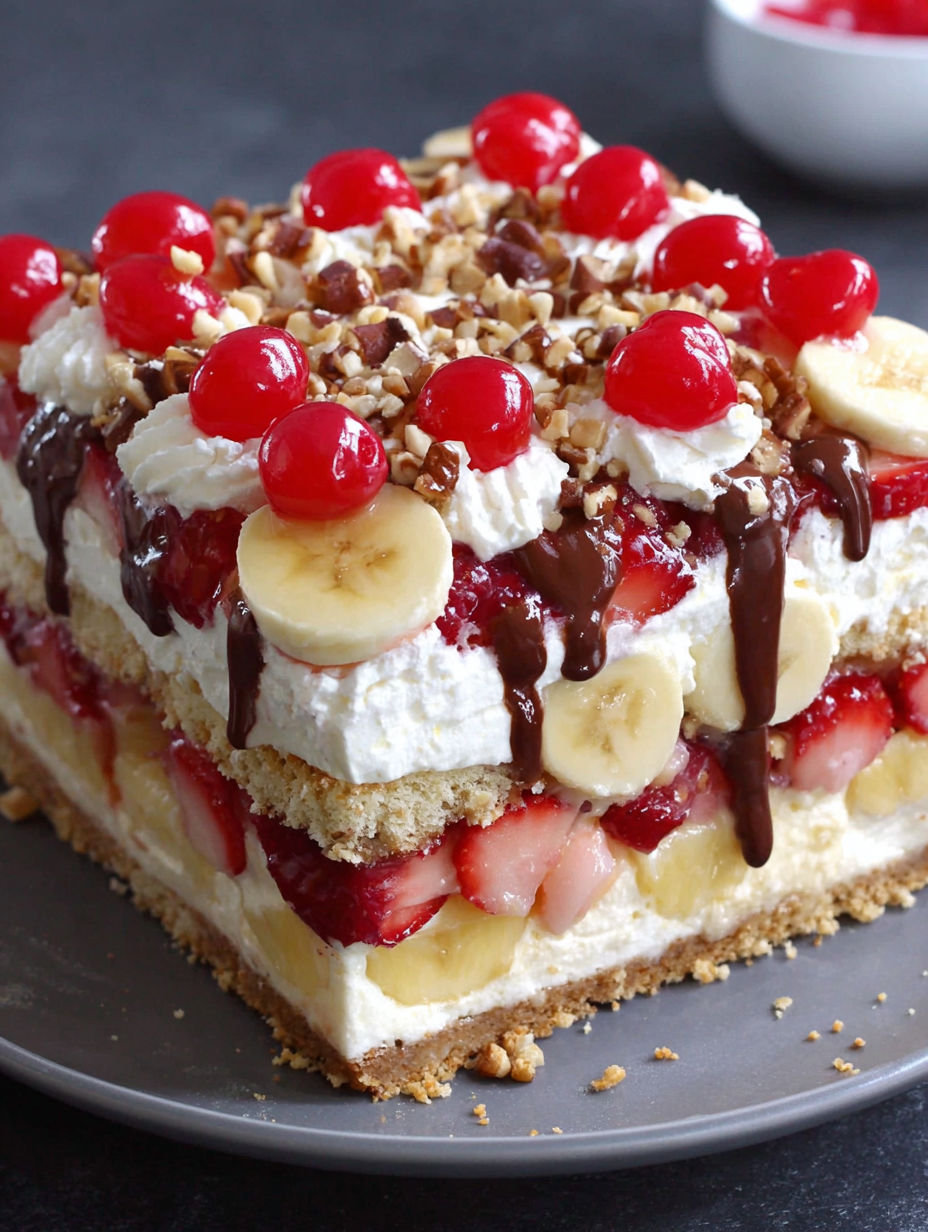
- Slice bananas into even rounds about the width of a pencil. Layer them in a single row over the crust with no overlaps. Spread drained crushed pineapple across the banana layer. Lightly press down with the back of a spoon so fruit sits flat.
- Add the Cream Cheese Mixture:
- Dollop the cream cheese mixture evenly over the fruit. Use an offset spatula to carefully smooth it out edge to edge. Take your time to create a flat even layer for a stunning final appearance.
- Arrange the Strawberries:
- Rinse strawberries in cold water and dry thoroughly. Slice into thick pieces. Place the slices across the surface in eye-catching patterns or a casual mosaic. Aim for every bite to have some strawberry.
- Top with Whipped Cream:
- Spread remaining whipped cream or Cool Whip over the strawberry layer. Start from the center and move outwards using a gentle swirling motion.
- Finish with Toppings:
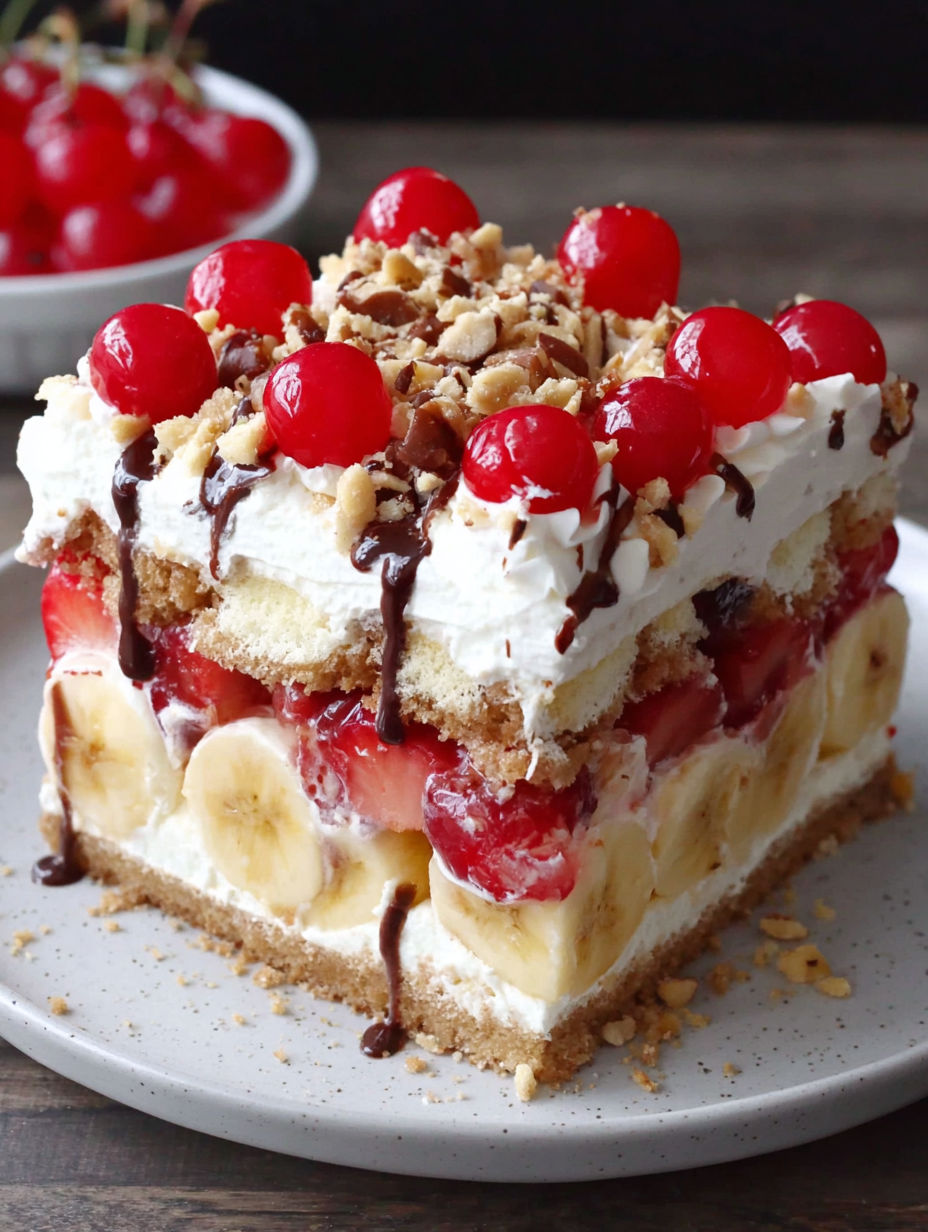
- Sprinkle chopped pecans evenly over the cake. Drizzle chocolate syrup in zigzags or swirls. Add a maraschino cherry to the center of each future slice for a touch of color. Carefully chill for at least 5 hours uncovered so the layers set fully before slicing.
The best part of this recipe is watching the strawberries and chocolate come together on top. My favorite topping is always fresh pecans because they remind me of my grandmother’s southern desserts. We always took pictures before the first slice every summer.
Storage Tips
Store this cake in its original dish covered well with plastic wrap to keep air out. If you have extra cherries or whipped topping add them just before serving for the prettiest look. This cake actually gets better as it sits overnight since the flavors blend.
Ingredient Substitutions
Swap gluten-free graham crackers if you need a gluten-free dessert and check the labeling on whipped toppers. Dairy-free cream cheese and coconut whipped cream give you a vegan version that is every bit as dreamy. For a twist use chocolate wafer crumbs for a decadent crust or honey in place of sugar to keep it more natural.
Serving Suggestions
Cut cake into neat squares using a warm damp knife for perfect edges. For parties offer extra fruit nuts and syrups in small bowls so guests can build every slice their own way. Add a scoop of vanilla ice cream next to the cake to really amplify the banana split flavors.
Cultural and Historical Notes
This cake draws inspiration from the American banana split popular at ice cream parlors for over a century. Families have made variations on banana split desserts since the 1950s especially as refrigerator cakes became popular at summer gatherings. That classic mix of banana pineapple strawberry and chocolate is a timeless favorite that feels both old-fashioned and fresh.
Seasonal Adaptations
Switch in fresh blueberries or peaches when strawberries are not at their prime. Stir in a little orange zest to the whipped cream for a burst of sunshine. Try crushed gingersnap cookies for a spiced autumn crust.
Success Stories
I once made this for a neighborhood picnic and everyone was convinced I bought it from a bakery. The kids especially loved helping drizzle on the chocolate syrup and place the cherries just so. Leftover squares made a perfect treat for breakfast the next morning which honestly surprised me with how well they held up.
Freezer Meal Conversion
To freeze make the cake up through the cream cheese layer skip any fresh fruit or topping. Wrap tightly in a double layer of plastic and foil and freeze flat. Thaw overnight in the refrigerator then add fresh whipped cream and toppings for the best look and texture.
For best results always use room temperature cream cheese and whip your cream with very cold tools. Give yourself time to enjoy the layering process and make it a family affair. The more care you put into each step the more fabulous your final creation will be.
Common Questions About Recipes
- → How long does this dessert last in the refrigerator?
Stored covered in the refrigerator, it stays fresh for 3–4 days. For peak flavor, enjoy within 2–3 days while the fruit is fresh and vibrant.
- → Can I make this ahead of time for a party?
Absolutely! Prepare 1–2 days ahead, but add whipped topping and cherries just before serving for best texture and presentation.
- → What stops the bananas from browning?
Toss banana slices in lemon or pineapple juice, or assemble the banana layer shortly before serving to maintain color and appeal.
- → Is this treat gluten-free or dairy-free friendly?
Yes! Use gluten-free graham crackers and plant-based cream cheese and whipped topping to fit dietary needs. Label check all ingredients.
- → How many people does it serve?
A standard 13x9 inch cake serves 12–15, making it great for gatherings or family desserts. Adjust slice size as needed.
- → Can I freeze this dessert?
Freeze up to 2 weeks, tightly wrapped. For best texture, add fruit toppings after thawing in the fridge as they can soften when frozen.
- → What are fun ways to customize this treat?
Swap in different fruits like mangoes or blueberries, try a chocolate or nut crust, or drizzle with caramel for extra flair and flavor.