
 Bookmark
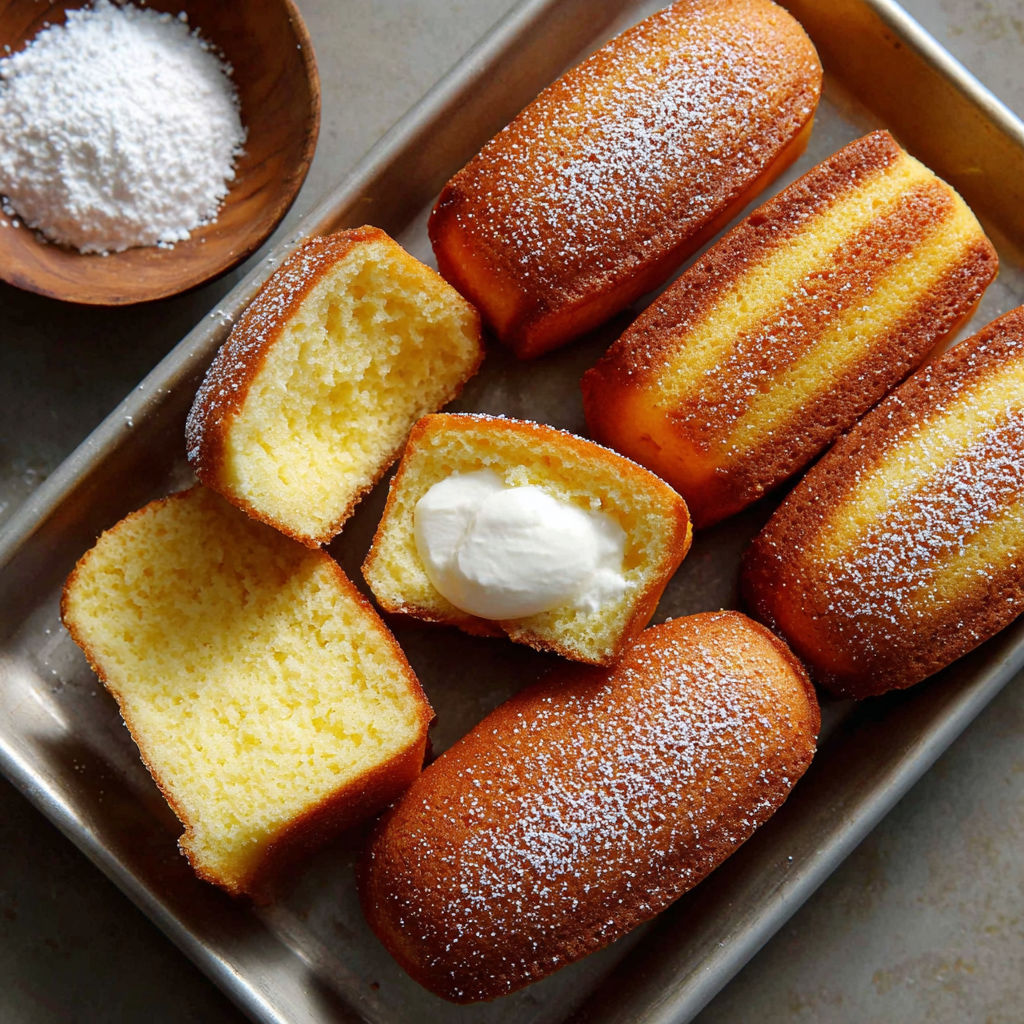
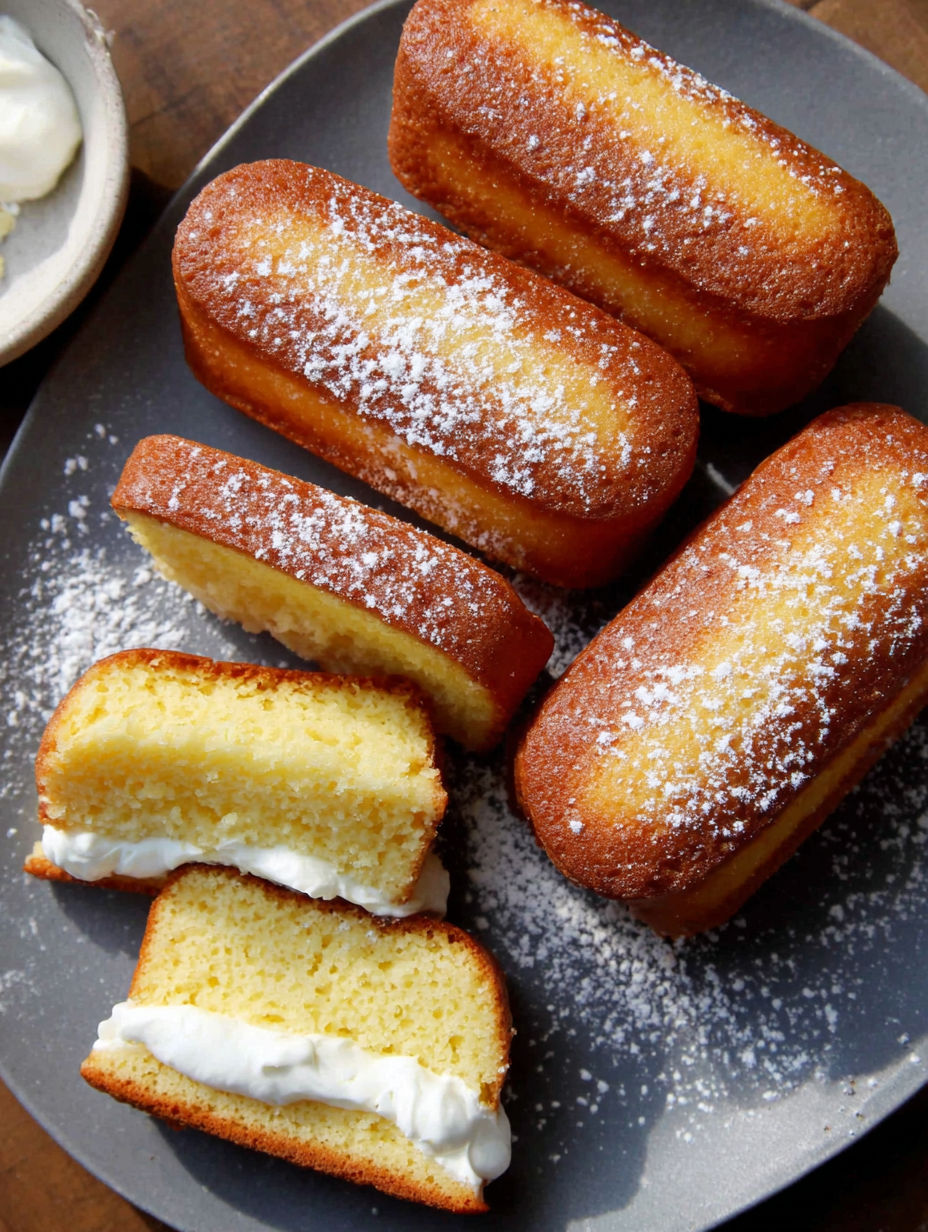
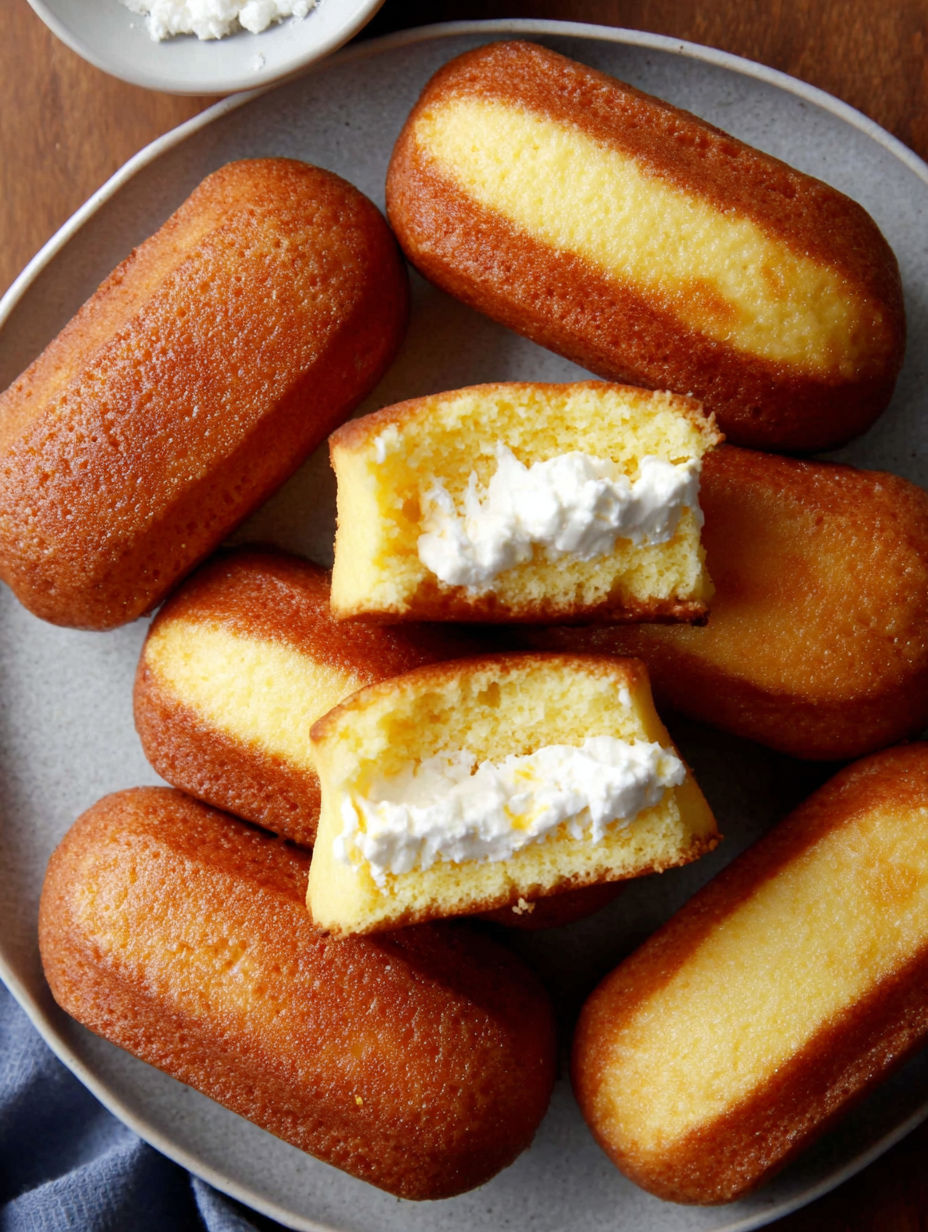
These homemade Twinkies bring back the joy of childhood treats with a fresh and wholesome twist. The tender golden sponge paired with a luscious marshmallow creme filling makes them a perfect snack for any occasion. No preservatives, no artificial flavorsjust simple ingredients coming together to create a nostalgic delight that is both comforting and indulgent.
I remember making these on a rainy afternoon when my kids insisted it was “Twinkie day,” and now it’s become a weekly little celebration in our house. They love that they get something sweet but homemade, and I love sharing that simple joy with them.
Ingredients
- Allpurpose flour: the base of the sponge, choose unbleached for better texture
- Baking powder: helps the cake rise and stay fluffy
- Salt: balances sweetness and enhances flavor
- Large eggs: room temperature eggs whip up better for a light sponge
- Granulated sugar: sweetens and stabilizes the egg foam
- Vanilla extract: adds warmth and depth to the sponge
- Milk: softens the batter and keeps the cake moist (use whole milk for richness)
- Unsalted butter: melted and folded in for tenderness and buttery flavor
- For the Filling: Unsalted butter, marshmallow creme, powdered sugar, vanilla extract, heavy cream
- Unsalted butter: softened for a creamy base
- Marshmallow creme: provides that classic fluffy twist, check for good quality
- Powdered sugar: sweetens and thickens the filling
- Vanilla extract: brings out the sweet flavors
- Heavy cream: adds richness and smooth texture
Instructions
- Preheat:
- Preheat your oven to 350 degrees Fahrenheit (175 degrees Celsius). Grease a Twinkie pan or a mini loaf pan thoroughly and set aside to prevent sticking.
- Sift dry ingredients:
- Sift together the flour, baking powder, and salt in a small bowl. This ensures even mixing and a light texture.
- Beat eggs and sugar:
- In a large mixing bowl, beat the room temperature eggs with granulated sugar using an electric mixer on high speed. Continue until the mixture turns thick, pale, and forms ribbons when the beaters are lifted, which usually takes about six to eight minutes. This step is crucial for building the sponge’s airy structure.
- Add vanilla:
- Add the vanilla extract to the egg mixture and gently fold it in to avoid deflating the batter.
- Fold in flour:
- Gradually incorporate the sifted flour mixture in batches, folding carefully with a spatula to keep the batter light and airy.
- Combine milk and butter:
- In a separate small bowl, combine warm milk with melted butter. Gently fold this mixture into the cake batter until just blended, being mindful not to overmix.
- Fill pans:
- Fill each mold with batter until about three quarters full to leave room for rising during baking.
- Bake:
- Bake in the preheated oven for twelve to fifteen minutes, or until the tops are golden and a toothpick inserted in the center comes out clean.
- Cool:
- Once baked, allow the cakes to cool completely in the pan before gently removing them to keep their shape intact.
- Prepare filling:
- To prepare the filling, beat the softened butter until it becomes light and fluffy. Add the marshmallow creme, powdered sugar, vanilla extract, and heavy cream, then beat the mixture again until it is smooth and creamy.
- Fill cakes:
- Using a piping bag fitted with a small round tip, poke three small holes into the bottom of each cooled cake. Pipe the marshmallow filling evenly into each cake through these holes.
- Serve or store:
- Serve the homemade Twinkies immediately or store them in an airtight container in the refrigerator to keep fresh.
My favorite part is the fillingits like a little cloud of sweetness that never gets old. I recall my grandmother making a similar treat when I was young, and the smell of vanilla and sugar always made the kitchen feel like magic. Sharing these Twinkies with my own family brings that warmth back every time.
Storage Tips
Store the Twinkies in an airtight container in the refrigerator to maintain their texture and freshness. Let them come to room temperature before eating for the best flavor. They also freeze well; wrap each cake individually in plastic wrap, place them in a freezer safe bag, and thaw overnight in the fridge before enjoying.
Ingredient Substitutions
If you prefer a dairyfree version, substitute the milk with almond or oat milk and replace the butter with a plantbased margarine. For a lighter filling, you can reduce the butter slightly and increase marshmallow creme or use whipped cream instead of heavy cream. Vanilla bean paste can be used in place of vanilla extract for a more intense flavor.
Serving Suggestions
These homemade Twinkies are fantastic with a simple dusting of powdered sugar or served alongside fresh berries. Pair them with a cup of hot tea or coffee for an afternoon pick me up. They also make a charming addition to dessert platters or packed in lunchboxes as a nostalgic treat.
These homemade Twinkies are a nostalgic treat that are simple to make and easy to customize. Enjoy sharing them with family and friends.
Common Questions About Recipes
- → What ingredients give the cakes their tender texture?
Using fresh eggs, melted butter, and careful folding of flour into the batter helps create a soft, tender sponge texture.
- → How is the marshmallow filling made creamy and fluffy?
The filling combines softened butter, marshmallow creme, powdered sugar, vanilla, and heavy cream, beaten until smooth and airy.
- → Can I use regular loaf pans instead of a Twinkie pan?
Yes, mini loaf pans can be used as a substitute; just adjust baking time to ensure a golden, cooked cake inside.
- → How do I fill the cakes evenly with the marshmallow creme?
Use a piping bag with a small round tip to poke holes in the bottom of each cake and gently fill with the marshmallow mixture.
- → What is the best way to store these treats after making them?
Store in an airtight container in the refrigerator to keep the cakes moist and the filling fresh for several days.
- → How long should the cakes cool before filling?
Allow the cakes to cool completely in the pan before removing and filling to prevent the filling from melting.