
 Bookmark
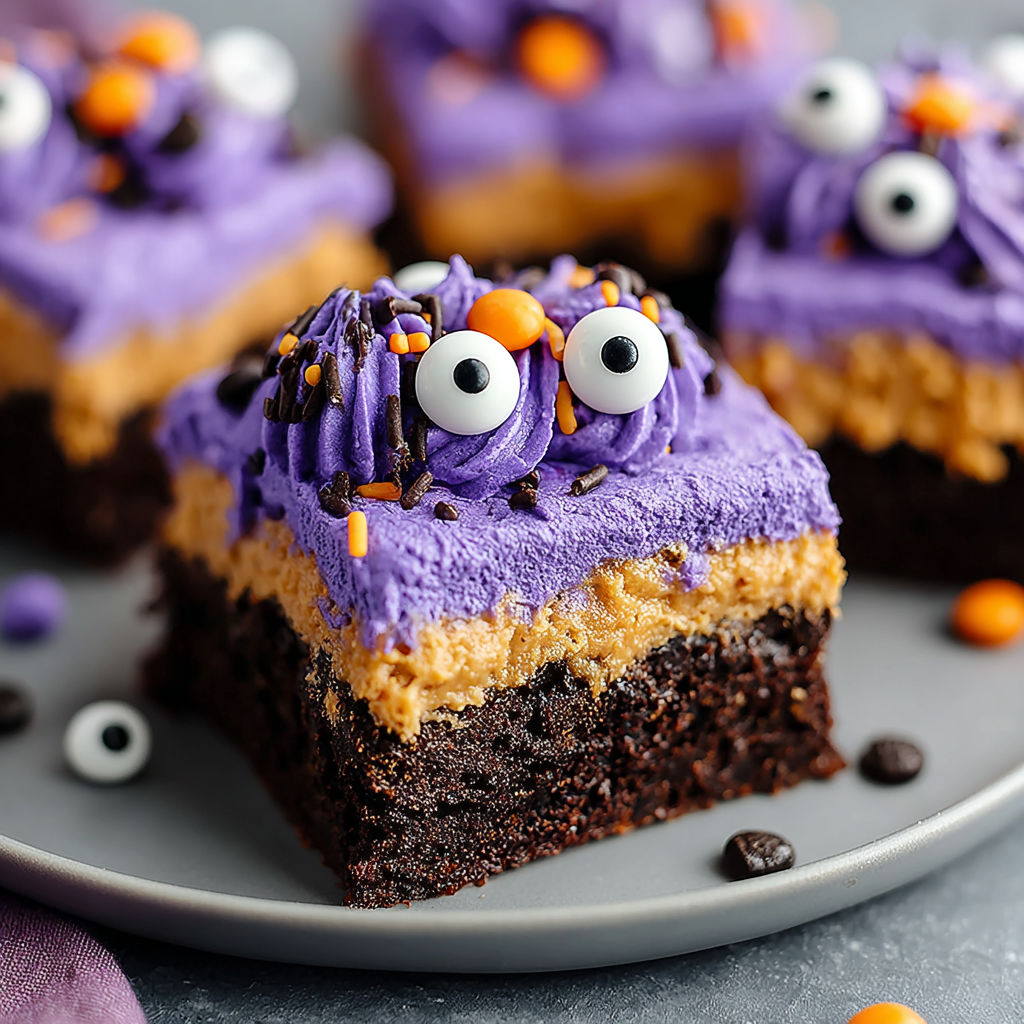
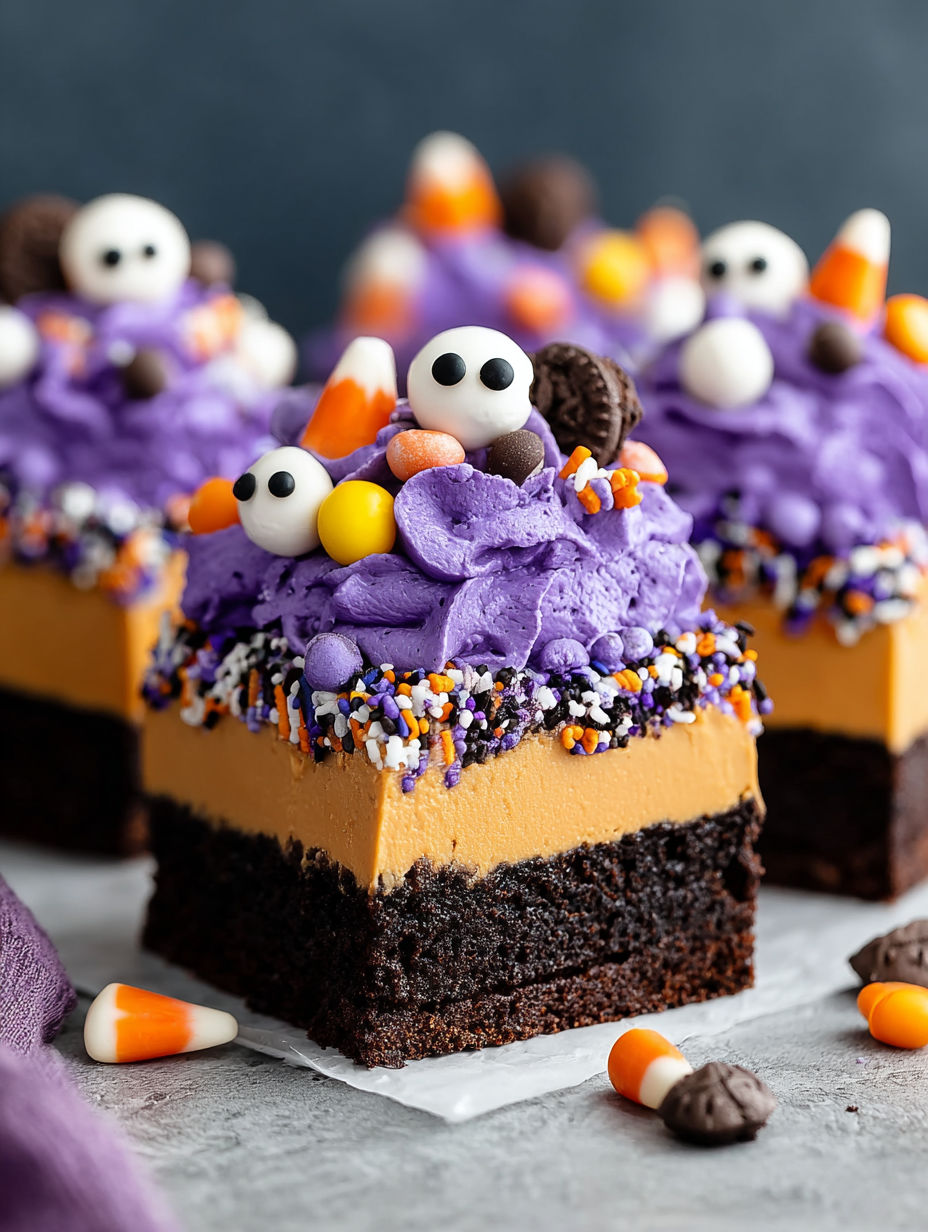
Monster Mash Brownies bring festive fun to any Halloween party with their rich chocolate base and bright, colorful vanilla frosting. These brownies offer the perfect balance of fudgy sweetness and playful decoration, topped with spooky candy eyes and colorful sprinkles that children adore. They are simple to prepare, ready in under an hour, and ideal for creativity, making them a standout dessert for Halloween gatherings or any festive occasion.
I first baked these for my nephew’s school Halloween party, and the way the kids reacted to the silly monster faces made for a memorable moment. Each year since, they have been a Halloween baking tradition at our house and always get rave reviews.
Ingredients
- Brownies: Brownie mix or homemade brownies, choose gluten free if needed for your guests’ dietary needs
- Frosting: Vanilla frosting, thick and creamy to hold vibrant gel food coloring and decorations
- Coloring: Gel food coloring in green, purple, and orange for bold Halloween vibes without thinning the frosting
- Decorations: Halloween sprinkles and candy eyes, mixed shapes add personality to each monster
- Extras: Optional edible glitter or candy corn to create monster teeth or sparkly effects for extra fun
Instructions
- Prepare Your Brownie Base:
- Preheat your oven as directed on your brownie mix or recipe instructions. Line a baking pan with parchment paper extending over the sides for easy removal. Mix your brownie batter thoroughly and pour it evenly into the pan to create a smooth surface that will later act as the monster canvas.
- Bake to Perfection:
- Bake the brownies in the preheated oven for the recommended time, usually between thirty to forty five minutes. Test for doneness by inserting a toothpick in the center which should come out with moist crumbs but no raw batter. Remove from oven to avoid overbaking, which can dry out the brownies and reduce the fudgy contrast with the frosting.
- Cool Completely:
- Allow the brownies to cool in the pan for ten minutes before lifting out the slab using the parchment paper. Transfer to a wire rack and let cool fully for at least one to two hours. This step is critical as frosting warm brownies will melt and ruin your decorations.
- Create Colorful Monster Frosting:
- Divide your vanilla frosting into bowls for each desired color. Stir in gel food coloring slowly, starting with one or two drops at a time, until the desired brightness is reached. Gel colors keep the frosting thick, perfect for texture and detail.
- Transform into Monsters:
- Spread your colored frosting on the cooled brownies using an offset spatula or butter knife. You can cover each brownie square with a single color or create sections with different colors for variety. Textured strokes mimicking fur or scales add character to your monsters. Work quickly so the frosting stays tacky for better decoration adhesion.
- Add Monster Features:
- While the frosting is still soft, gently press candy eyes and Halloween sprinkles into the surface. Use chocolate chips, edible glitter, or candy corn to form teeth, antennae, or wild hair. Be creative, no two monsters need to look alike.
- Slice and Serve:
- Cut brownies into squares or rectangles with a knife wiped clean and slightly warmed for neat edges. Arrange on a serving platter and watch these colorful monsters disappear at your party.
My favorite part of this recipe is the candy eyes they add so much life and personality to the brownies. A special family memory is gathering around the table as everyone designed their own unique monsters, turning baking into a lively, creative group activity that my kids still talk about every Halloween.
Storage tips
Store decorated Monster Mash Brownies at room temperature in an airtight container for up to three days to keep frosting and decorations intact. Refrigerate for up to five days to firm the frosting and enhance chewiness. Freeze plain, unfrosted brownies for up to three months wrapped tightly. Always thaw before frosting to maintain texture and color.
Ingredient substitutions
Use white chocolate chips with a dark frosting dot if candy eyes are unavailable. Choose plant based brownie mix and frosting for a fully vegan Halloween treat. Swap gel food coloring for natural powders or fruit purees for a dye free option that adds a seasonal twist.
Serving suggestions
Serve these colorful brownies alongside spiced apple cider or a lime sherbet punch for a festive touch. Pair with ghost shaped sugar cookies or pumpkin cupcakes for a varied Halloween dessert spread. Set up a decorating station where guests can create personalized monster brownies as a fun party activity.

Making Monster Mash Brownies turns a simple chocolate dessert into a creative family event that delights both kids and adults. Bake a batch and invite some monster making fun into your Halloween celebration.
Common Questions About Recipes
- → What kind of brownie mix works best?
Both store-bought and homemade mixes work well. Choose a high quality mix for convenience or make from scratch for richer flavor. Gluten free options are also suitable.
- → How can I achieve vibrant frosting colors?
Use gel-based food coloring added to thick vanilla frosting. Gel colors provide bright, bold hues without thinning the frosting.
- → How do I keep frosting from melting on brownies?
Allow brownies to cool completely before frosting to prevent melting. Chilling the frosting briefly before spreading also helps maintain structure.
- → Can these brownies be made vegan or dairy free?
Yes, swap in plant-based brownie mixes and dairy free frosting for a fully vegan-friendly treat with vibrant colors and great texture.
- → How should I store decorated brownies?
Store in an airtight container at room temperature up to 3 days to keep decorations fresh. Refrigeration extends freshness but may firm the frosting.
- → What decorations work well besides candy eyes?
Try edible glitter, candy corn, chocolate chips, or white chocolate dots for unique monster details and texture variety.